According to countless surveys, men have been proven to be more attracted to women who have wide eyes.
A well known reason why women spend hours every month applying mascara, eyeliner, and shadow.
It’s no wonder we women are always on the hunt for ways to have thick, fluffy, and fabulously curled lashes.
To solve this, there was the advent of eyelash extensions, which really took off a few years ago.
For most women, lash extensions have been a terrific addition to their beauty regimens, saving time and frustration without daily mascara application.
But what about the ladies who can’t have lash extensions, or don’t even have the time for that?
Well, ladies, I am here to make your day!
Today I will be introducing a new technique to achieve fabulously curled lashes.
I introduce, the Lash Lift.
The scope of this article will cover what it is, how it works, when and why you should try it, and how to maintain it once you do.
WHAT IS A LASH LIFT?
The lash lift is a modern day upgrade to the outdated lash perm.
This is a treatment that changes the structure and texture of the natural lashes.
The lash lift differs from a perm because it uses silicon shields as the apparatus for creating the curl, rather than spongy rods.

The silicon shield is placed on the eye, as you can see. This is a large shield.
The lash perm is inferior in many ways, but the #1 reason is customization. Traditional perming inverts the lashes making them curl round and back on themselves. Extreme curl like this is only beneficial for select few.
A great alternative for the woman who has super short lashes, but a terrible one for someone with long and thick lashes. The lashes were left looking ridiculous and undesirable.
Let me make a note here that I was trained 6 years ago in the traditional perming technique and have never once considered adding it to my repertoire.
Now that lash lifts are a thing, different story.
WHAT IS THE LASH LIFT PROCESS LIKE?
The process is pleasant and relaxing.
A short consultation is necessary to determine which shield(s) are eligible for use. With lash extensions, it is the natural lash that determines the outcome. With the lash lift, the same rings true.
Upon completion of your consultation, you will be instructed to lay comfortably on a spa bed where your stylist will give the lashes a thorough cleansing.
It is important to remove any oils or product that may be on the lashes so as not to interfere with the perming solution.
Collagen eye pads will be placed on top of the lower lashes to separate them from entangling with the upper lashes. We’re not trying to curl your bottom lashes into your eyeball now!
At this point you will close your eyes and they will remain closed for the duration of the service.
Using a skin-safe adhesive, the shields are placed on the eyelids as close to the lash line as possible.
Your stylist will place the shields starting with the inner corners and working the placement outward.
The shields will be pressed on with light pressure for 30-45 seconds to ensure they do not lift during the treatment.
The same weak and gummy adhesive will be used to fold the lashes back onto the shields to ensure they are held in place for application.
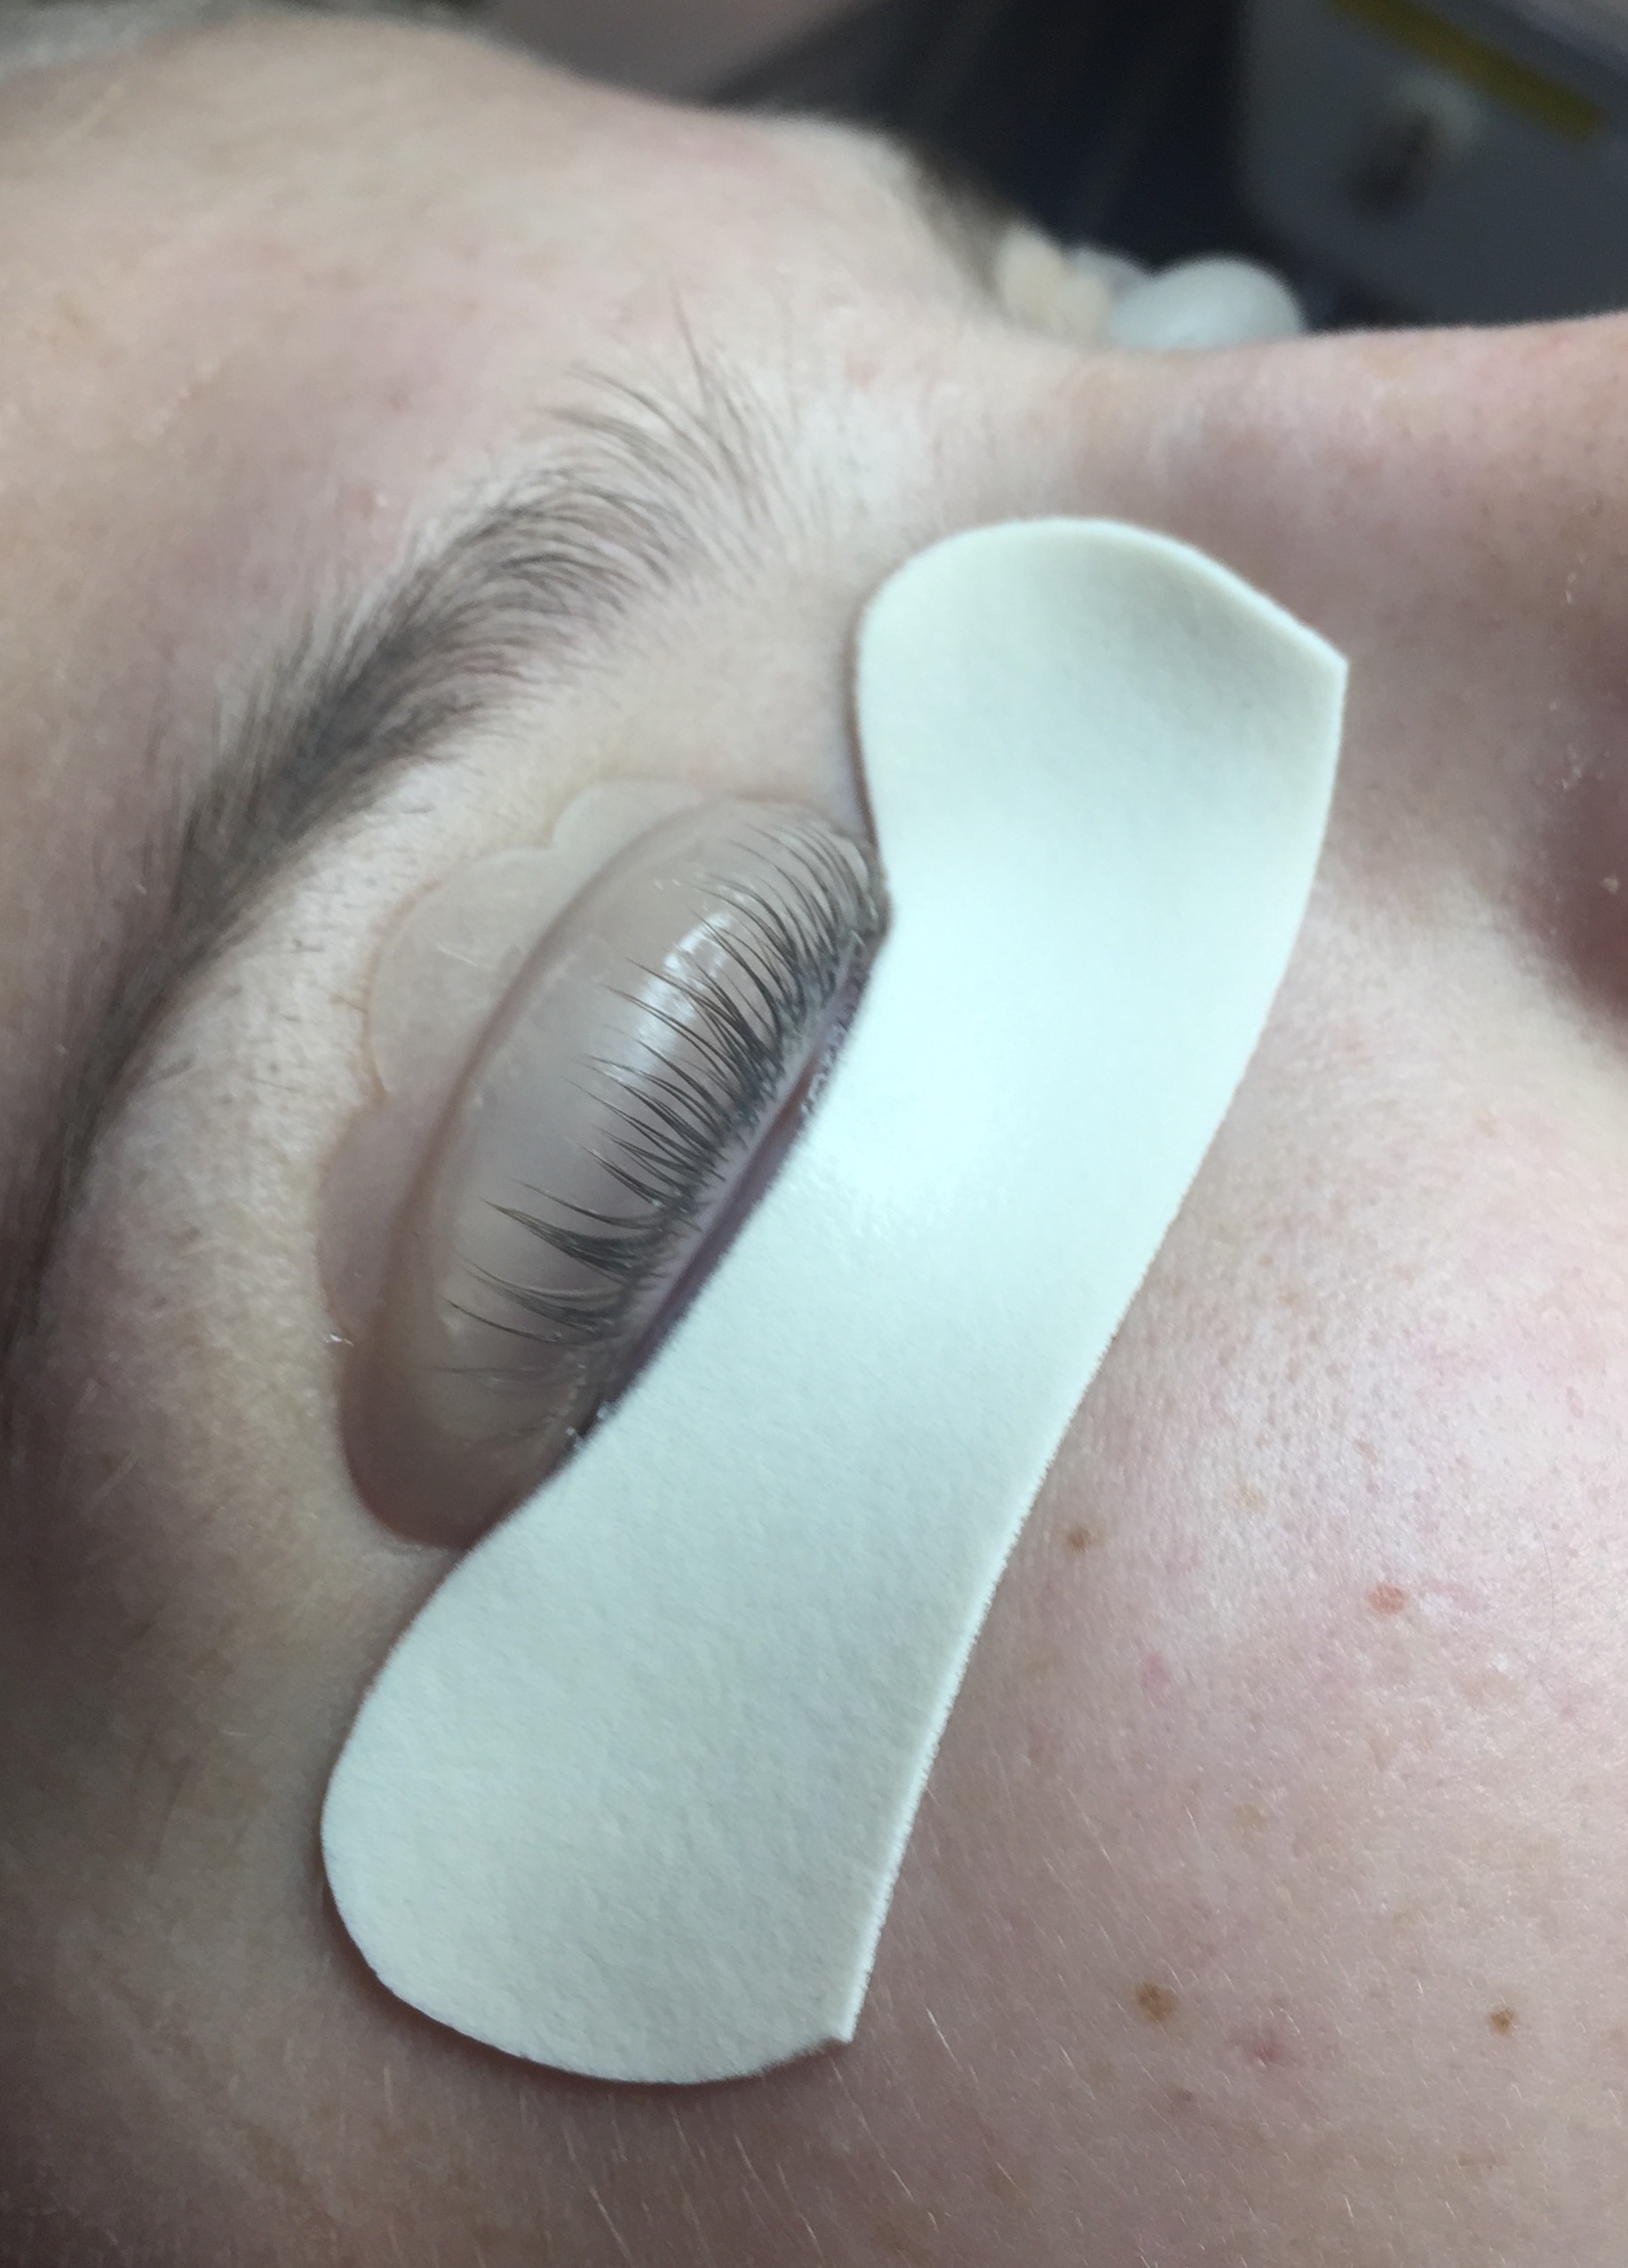
The lower lashes are protected by the foam tape and the upper lashes have been adhered to the silicon shield. After processing, this is the shape they will take!
Next step is solution time!
Depending on your natural hair, the perming solution will be left on for 8-12 minutes, then removed. This will be followed by the setting (neutralizer) solution for an additional 8 minutes.
If you are adding a tint to the service to achieve darker lashes as well, that will be applied after the neutralizer has been removed.
Lash tinting during a lift only takes half the time because the lashes have been prepped and absorb dye more readily.
The tint will then be removed and a nourishing oil will be applied.
This will sit for 3-5 minutes, but I like to go with the full 5 minutes. Perming is very drying to the hair and nourishment is key.
The oil used here will also be the aid in which the shields are removed. You will feel your stylist wiggle your hair back and forth, freeing it from the shields. She will do the same process to free the shields from the eyelids.
If there is any residual tint, a wet swab will be used to spot remove.
Your stylist will comb through your lashes and you will be free to open your pretty peepers and admire that beautiful curl!

The nourishing oil may leave you feeling like the lashes are clumped together at first. After your first shampoo you will get the full, fluffy effect.
The service takes an hour in total from start to finish and lasts for 6-8 weeks.
Not bad, huh?
Wondering if you are a candidate for the lash lift? Keep reading my friend.
CAN I GET A LASH LIFT?
An hour every other month to have dark and curled lashes?!
Yeah I’d be right on that bandwagon if I wasn’t already addicted to lash extensions.
So when do you know if the lash lift is right for you?
You should try the lash lift if:
1. You detest mascara and want a solution to enhance your lashes.
2. You are allergic to eyelash extension adhesive.
3. You are happy with your natural lashes, but they are straight and hard to notice.
4. You are looking for a low maintenance eyelash enhancement.
5. You think the before and after photos are awesome and want that on your face.
As previously stated, the natural lashes make the rules. In order to have a lash lift, you must first have natural lashes.
The thicker and longer they are, the more customization that's possible.
The small shields create the most dramatic lift and are best for clients with shorter lashes.
The medium shields are considered the “universal” shield and give both a nice lift and curl to the natural lash.
The large shields are best for clients who want only a soft curl, or for clients who have exceptionally long lashes.

BEFORE A LASH LIFT: HOW TO PREPARE
1. Come eye makeup free.
As stated previously, your stylist will clean the lashes to prep for the service.
However, your stylist should not be spending more than 1-2 minutes cleansing. Remove any and all eye makeup prior to arriving.
2. Discontinue use of waterproof mascara 3 days prior to the service.
This stuff hangs on for dear life.
The compounds left behind can affect the perming solution, so discontinue at least 3 days before the service.
3. Remove your contacts.
Either wear your glasses or bring your case.
AFTER A LASH LIFT: HOW TO MAINTAIN
1. Be gentle.
No rubbing. For the sake of retaining youthful looking eyes, you shouldn’t be doing this anyway.
2. Do not wet the lashes for the first 24 hours.
Avoid saunas.
Avoid swimming.
Avoid facial services.
Avoid showers (bath only)
The chemicals used to create the lift will weaken and you’ll have wasted your time and money.
3. Do not wear eye makeup for the first 24 hours.
The solution needs time to set, so don’t get fancy with mascara (if you even want it anymore) or shadows.
4. Keep them nourished.
After the initial 24 hours, it is crucial you keep the lashes nourished and hydrated. I usually give my clients the remaining nourishing oil (they come in individual packets.)
5. Be mindful how you sleep.
Don’t sleep with your face in a pillow. This can alter the shape of the curl.
6. Show it off to all your friends!
Make them jealous, we won’t judge!
WHO IS NOT A CANDIDATE FOR LASH LIFt?
One of the best things about the lash lift is how versatile and low maintenance it is.
However, there are some instances in which this procedure may not be right for you, right now.
1. If you have recently had lasik surgery, you must wait 6 months.
When in doubt, consult your physician.
2. If you’ve recently had a blepharoplasty, you must wait 12 months.
This surgery increases the sensitivity to the eye area. Even after 12 months, the solution may irritate the eye. Consult your physician if in doubt.
3. If you have an active eye infection.
Conjunctivitis (pink eye) is a prime example.
Wait until you are fully recovered, then schedule your appointment.
4. If you recently had chemotherapy, you must wait 12 months.
As always, consult your physician first.
5. If you have damaged lashes, or gaps in your lashes.
If your lashes are damaged, wait 1-3 months before scheduling. Give those babies time to recoup.
If you have gaps in your lashes this procedure may make them more pronounced.
6. Not recommended if you have chronic dry eye.